Beginners Guide: Embedded Swift and Visual Studio Code (LSP Code Completion)
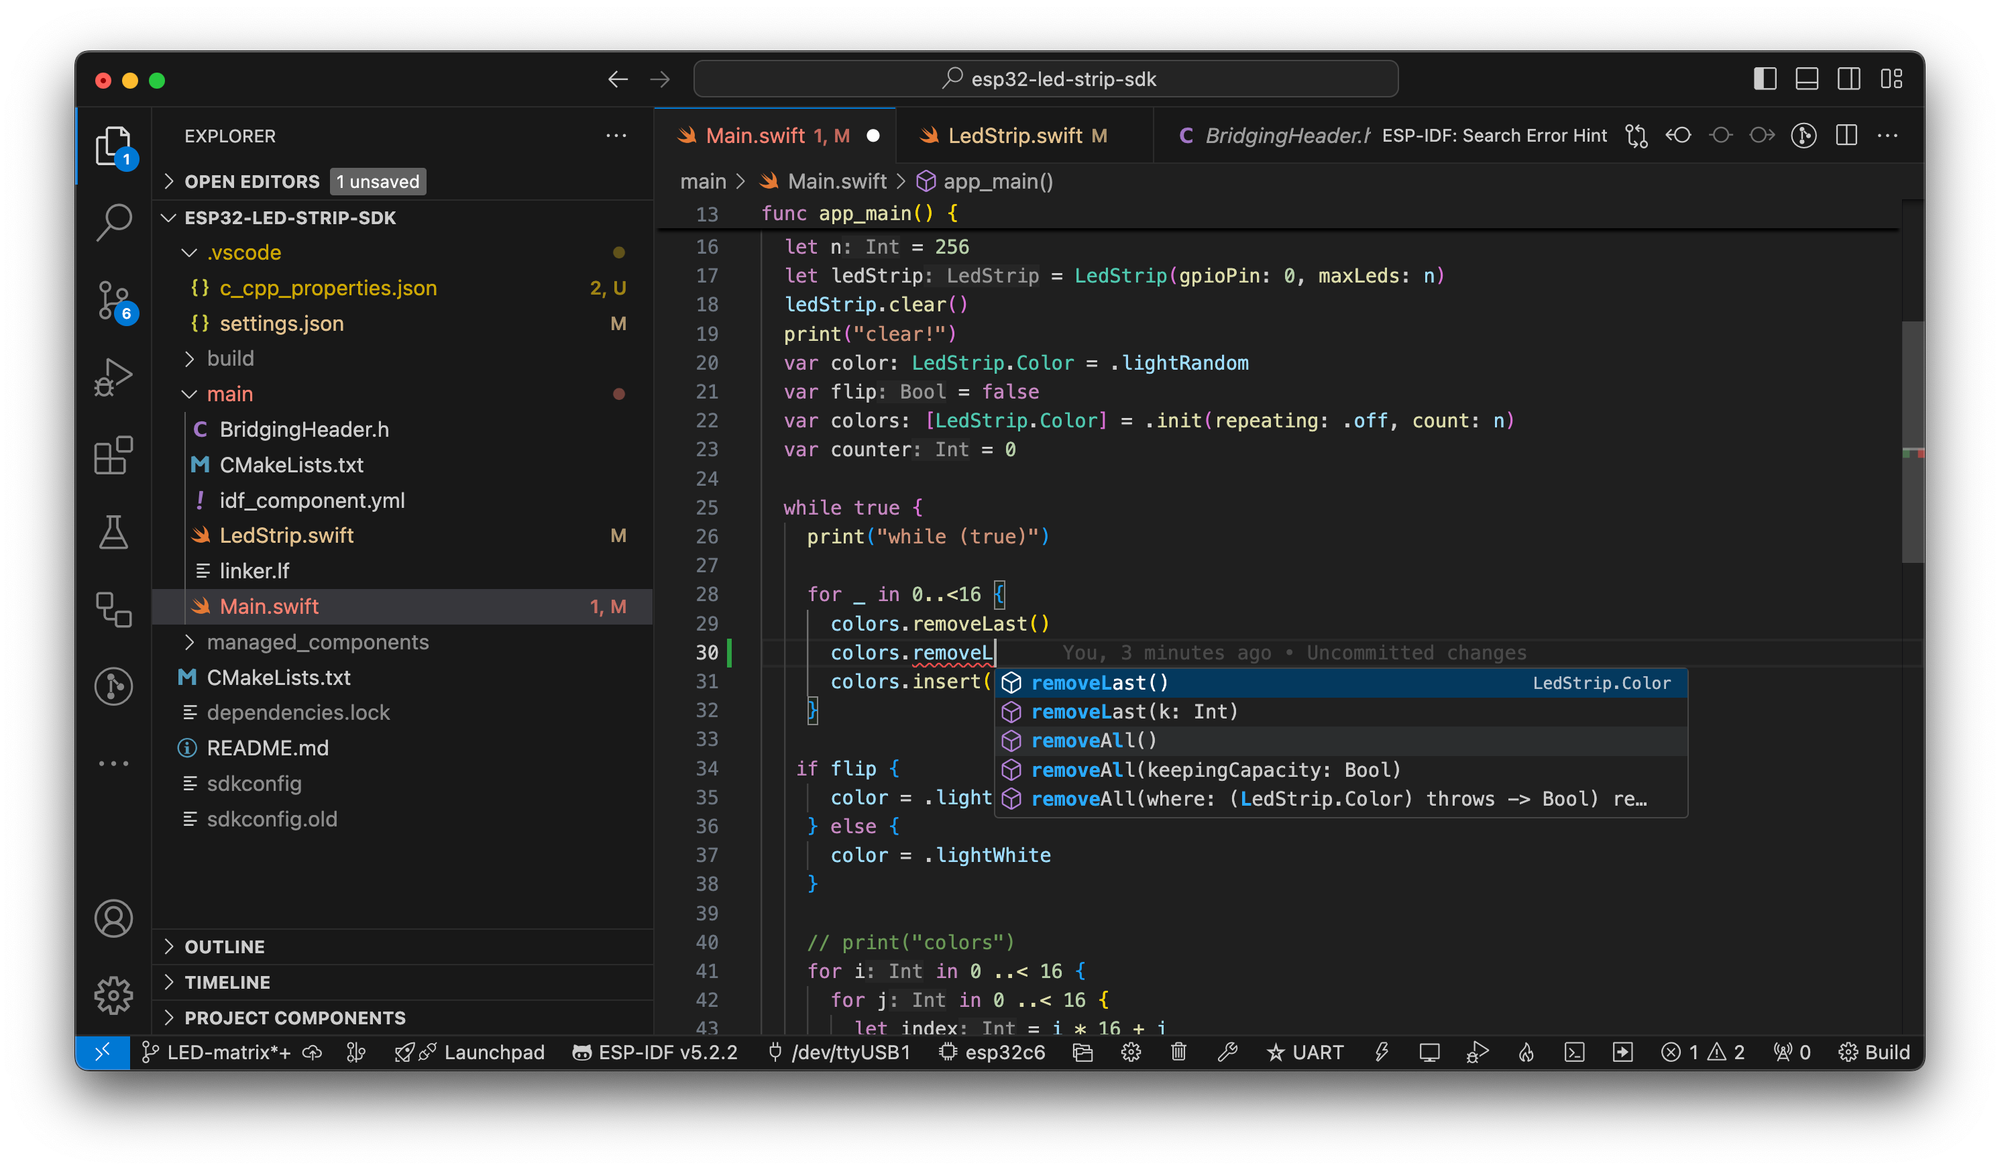
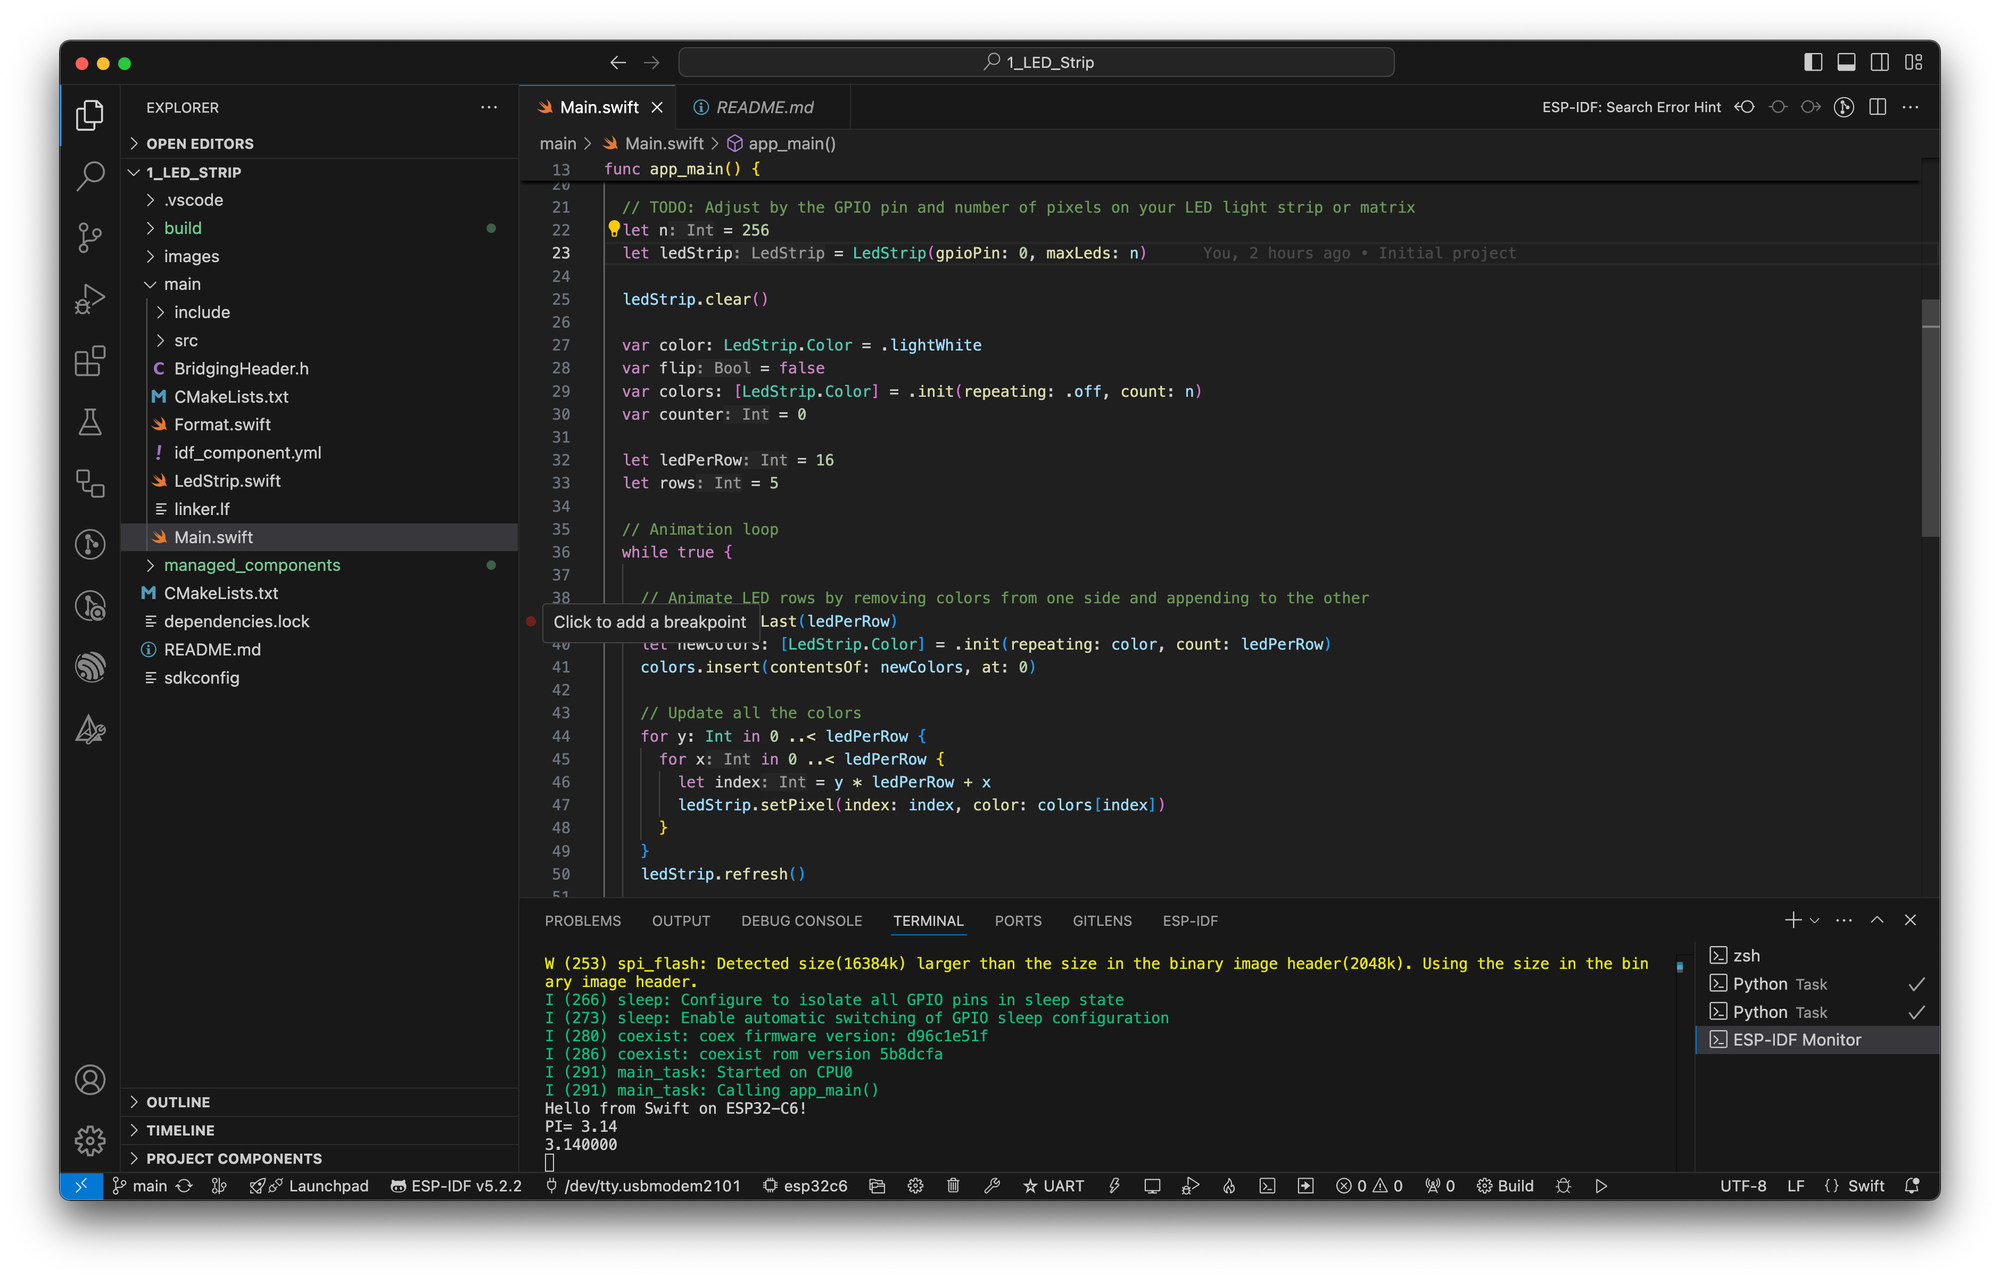
The Embedded Swift Beginners Guide will help you jumpstart your journey with Embedded Swift. You will learn how to get started with Visual Studio Code so that you can enable LSP Code Completion and look up documentation as you write Embedded Swift code. My sample project connects to a LED matrix (LED Strip) and creates a rolling animation.
Outside of Xcode you will have to learn some new things to be able to work with Embedded Swift.
CMake and the ESP-IDF toolchains are used to help build your code into a format that can be flashed onto a micro controller like the ESP32-C6.
Embedded Swift is Experimental (Not Full Featured)
Since Embedded Swift is experimental, I am sharing my learning experience as I go. Not everything is feature complete, so there are rough edges, but you can get something working with non-Apple hardware.
Issues as of 9-12-2024:
- Printing
Float/Doubledoes not work (I have included 2 workarounds in my sample project) Int.randomcrashes on ESP32-C6 (and maybe other devices)
There are not a lot of resources out there, so I am sharing what has worked for me. With tons of choices of hardware it is not clear what you need, so use the hardware I recommend as a starting point.
I don't know much about hardware, but my Dad is an electrical engineer and has been working in this type of space for a while. He helped me get started with the intitial wiring, soldering, and 5V power connections.
Download the Embedded Swift Code
My goal is to create animations with LED matrix displays.
I have a sample project that is configured for my ESP32-C6 hardware. You will have to make some changes, read the blog post and the included README.md for details.
Click here to download the sample project for Visual Studio and Embedded Swift.
Before you Start
Before you start, follow Apple's guide and watch my tutorials if you get stuck:
If you get stuck, check out my articles on Embedded Swift
- Embedded Swift Tutorial - Getting Started (Everything you need to know)
- How to Troubleshoot Embedded Swift and the Matter Smart Light
Get the Hardware
You can buy the hardware that I'm using for Embedded Swift on Amazon.
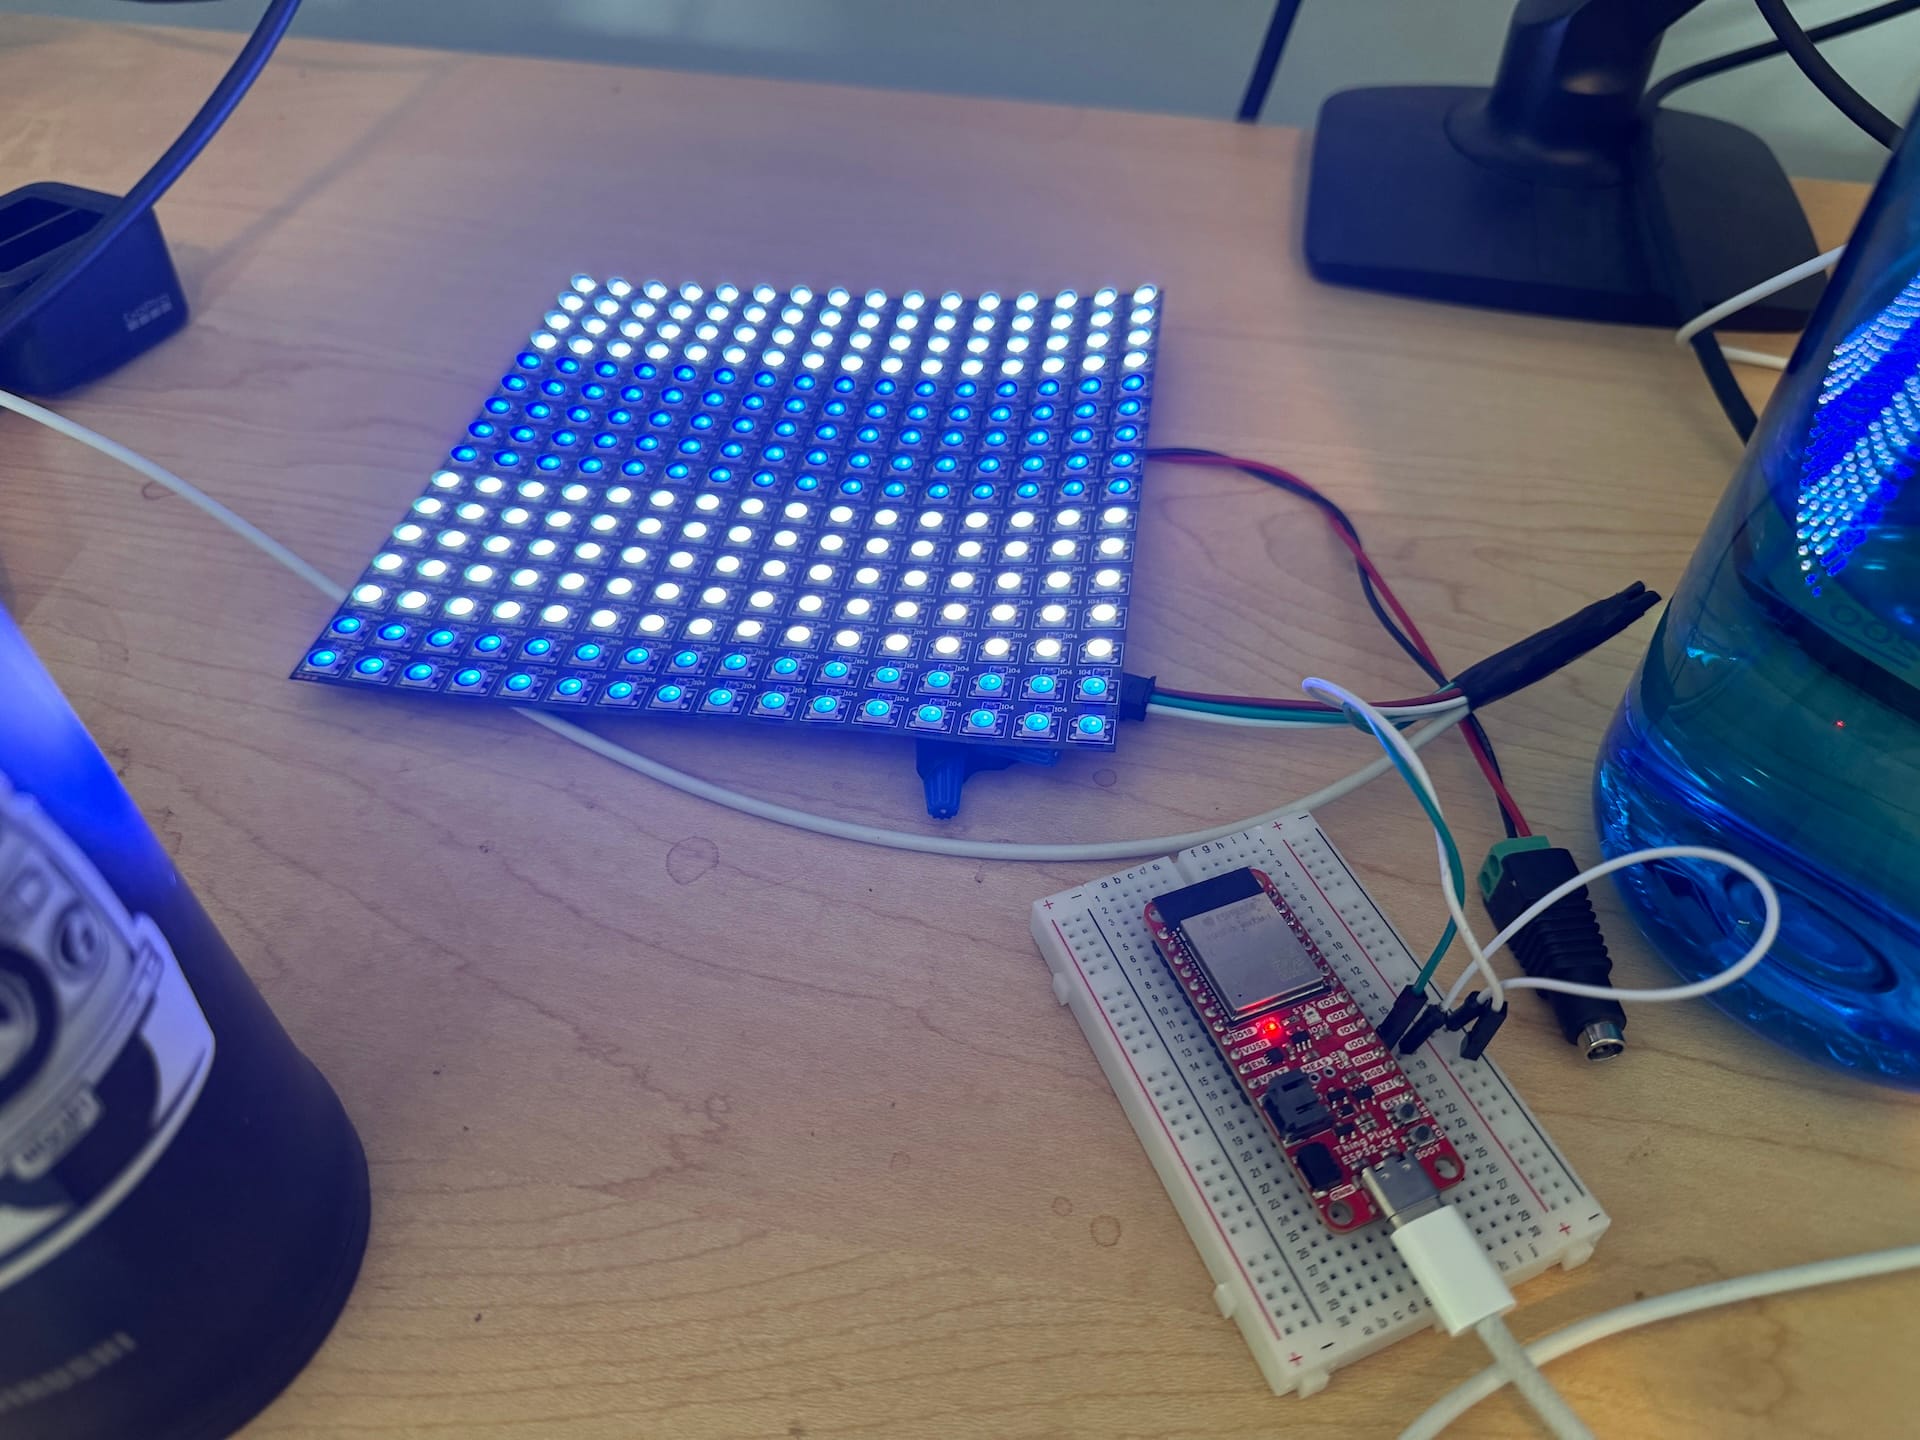
You only need an ESP32-C6 to get started, any extra part is only when you're ready to start controlling more LEDs. Each ESP32-C6 should have an on-board LED and will be powered by USB from your Mac.
I'm currently using the ESP32-C6 Thing Plus from SparkFun since it supports HomeKit, but that is only because I couldn't figure out what model Apple was using in the demo. Use the link above to find both USB-C based micro controllers.
If you want to keep things easy, the Espressify ESP32-C6 dev board is already soldered to pins, so you don't need to solder the pins on to use with a breadboard.
Different hardware is going to have different GPIO ports for the onboard LED, which is the first LED you'll control. After that you can hook up an LED or LED light strip (or matrix) to any of the GPIO ports you want to control from code.
Install Serial Port Drivers
On Mac you may need to install additional drivers for the UART (and reboot) if you cannot see the port via the command in Terminal:
ls /dev/cu.*
These drivers will allow you to see the serial port connection in macOS for the uart/USB device on the micro controller. Without them you will only see the tty interface and not the cu.* serial interface.
- Download: CP210x VCP Mac OSX Driver (Unblock pop-ups in Safari)
- Unblock Driver in Privacy & Security
- Silicon Laboratories Inc (Background Mode) below Login Items > "Allow in Background"
- System software from the following developers was updated and the system needs to be restarted before it can be used.
- Enable: CP210xVCPDriver
Configure Visual Studio For Embedded Swift
After you have ESP-IDF installed, then you are ready to configure Code Completion and setup within Visual Studio.
- Install Visual Studio Code
2. Note: If you updated from Intel Macs, you may need to reinstall a new version designed for Apple Silicon (Same for the plugins below) - Install Visual Studio Code Extensions:
- Configure ESP-IDF Extension in Visual Studio Code
- Follow the guide for ESP-IDF setup within Visual Studio Code
Enable Swift LSP Code Completion in Visual Studio Code
If you followed Apple's guide you should have a Swift toolchain, if not, you need to install one with Embedded Swift (Choose Universal Architecture from Trunk Development (main)): https://www.swift.org/download/
- Create it and add the following Swift and lldb settings to
.vscode/settings.json.
When you configured the ESP32 device, you should see a file named .vscode/settings.json. I'm using an ESP32-C6 device, so I see this entry.
{
    "idf.adapterTargetName": "esp32c6",
}
After you've installed a Swift toolchain (latest version of Swift have Embedded Swift), you'll need to find your Swift Toolchain and use that to fix code completion in Visual Studio Code.
/Library/Developer/Toolchains/swift-DEVELOPMENT-SNAPSHOT-2024-09-04-a.xctoolchain
Or you may be able to use the latest symlink:
/Library/Developer/Toolchains/swift-latest.xctoolchain
{
    "idf.adapterTargetName": "esp32c6",

    "swift.swiftEnvironmentVariables": {
        "DEVELOPER_DIR": "/Applications/Xcode.app"
    },
    "swift.path": "/Library/Developer/Toolchains/swift-DEVELOPMENT-SNAPSHOT-2024-07-15-a.xctoolchain/usr/bin",
    "lldb.library": "/Library/Developer/Toolchains/swift-DEVELOPMENT-SNAPSHOT-2024-07-15-a.xctoolchain/System/Library/PrivateFrameworks/LLDB.framework/Versions/A/LLDB",
    "lldb.launch.expressions": "native"
}
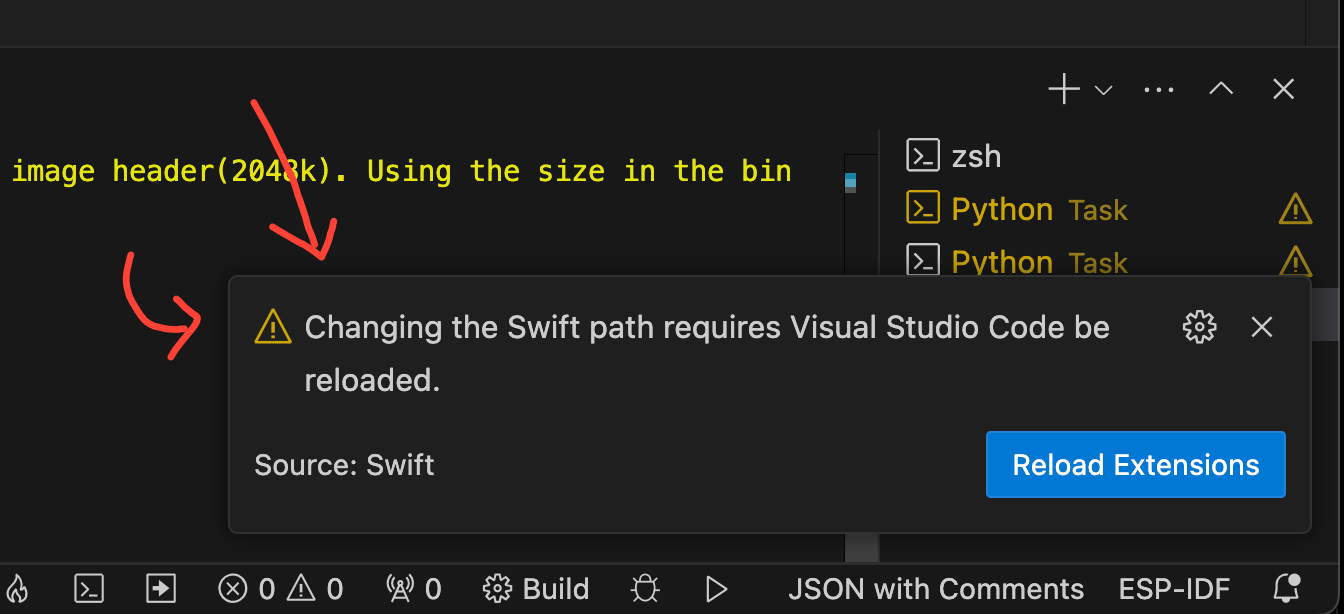
You'll need to refresh or reload Visual Studio Code for these
NOTE: Look in Bottom Right Corner of Visual Studio Code
Visual Studio code needs to reload any time you make changes to the Swift path.
Tap the "Reload Extensions" button to update the Swift Extension with the latest Swift path (if you're using the experimental Swift toolchains).
At some future date, you may not need to customize the Swift path when Embedded Swift is stable and included in the released version of Swift.
Configure the Serial Port and Device Target in Visual Studio Code
- Set the serial port of your device: Press
F1(orCommand + Shift + P), typeESP-IDF: Select Port to Use: and choose the serial port your device is connected. (Connect the USB if not connected) - Select an Espressif target (i.e., esp32c6) with the
ESP-IDF: Set Espressif Device Targetcommand.
Fix the C++ Search Paths
If you followed the ESP-IDF Visual Studio Guide, you may have done this step, but I skipped around and didn't do all the steps because I didn't know what I'm doing. Their sample code wasn't exactly what I needed, so here is what worked for me.
You need to add a file in the .vscode folder. On macOS it should look like:
.vscode/c_cpp_properties.json.
{
    "configurations": [
        {
            "name": "ESP-IDF",
            "compilerPath": "/usr/bin/gcc",
            "compileCommands": "${workspaceFolder}/build/compile_commands.json",
            "includePath": [
                "${config:idf.espIdfPath}/components/**",
                "${config:idf.espIdfPathWin}/components/**",
                "${workspaceFolder}/**"
            ],
            "browse": {
                "path": [
                    "${config:idf.espIdfPath}/components",
                    "${config:idf.espIdfPathWin}/components",
                    "${workspaceFolder}"
                ]
            }
        }
    ],
    "version": 4
}
NOTE: If you're not doing cross-platform Windows development, you can remove those search paths with the idf.espIdfPathWin variable.
Code, Build, and Run
After you configure all these steps you should now have code completion working and you should be able to build, flash, and monitor your ESP32 directly from Visual Studio Code.
You should also be able to jump to definition.
After you write your code, you can run it using one command.
- If you press
Command + Shift + Pand then typeESP Build Flash Monitoryou should be able to do everything in one step. - NOTE: To stop monitoring, press
Control + ]. (I don't always have to stop it if I re-run theESP Build Flash Monitorcommand, but it didn't always work at first) - On subsequent runs Visual Studio Code remembers your last command, so that makes it easy to re-build and run the code.
Alternatively, you can use idf.py from Terminal:
idf.py build flash monitorDownload the Code
You can download my sample project for Embedded Swift with the matrix LED animation.
Click here to download the sample project for Visual Studio and Embedded Swift.
Connect
If you have any questions, tips, or suggestions reach out on X: @PaulSolt.
I don't know exactly what I'm doing with Embedded Swift or Embedded Hardware, but I'm documenting as I learn along the way.
