
How to Troubleshoot Embedded Swift and the Matter Smart Light

Please follow the tutorial from Apple to get setup. These notes are my findings from working with the ESP32-C6 (Sparkfun) and controlling it. There is a fair amount of setup and it will take you 1-2 hours to complete all the setup and software install.
Additional Links
- Embedded Swift Examples: https://www.swift.org/blog/embedded-swift-examples/
- Help Forum: https://forums.swift.org/t/embedded-swift-example-projects-for-arm-and-risc-v-microcontrollers/71066
- Buy a ESP32-C6 (Sparkfun is what I used): https://www.sparkfun.com/products/22924
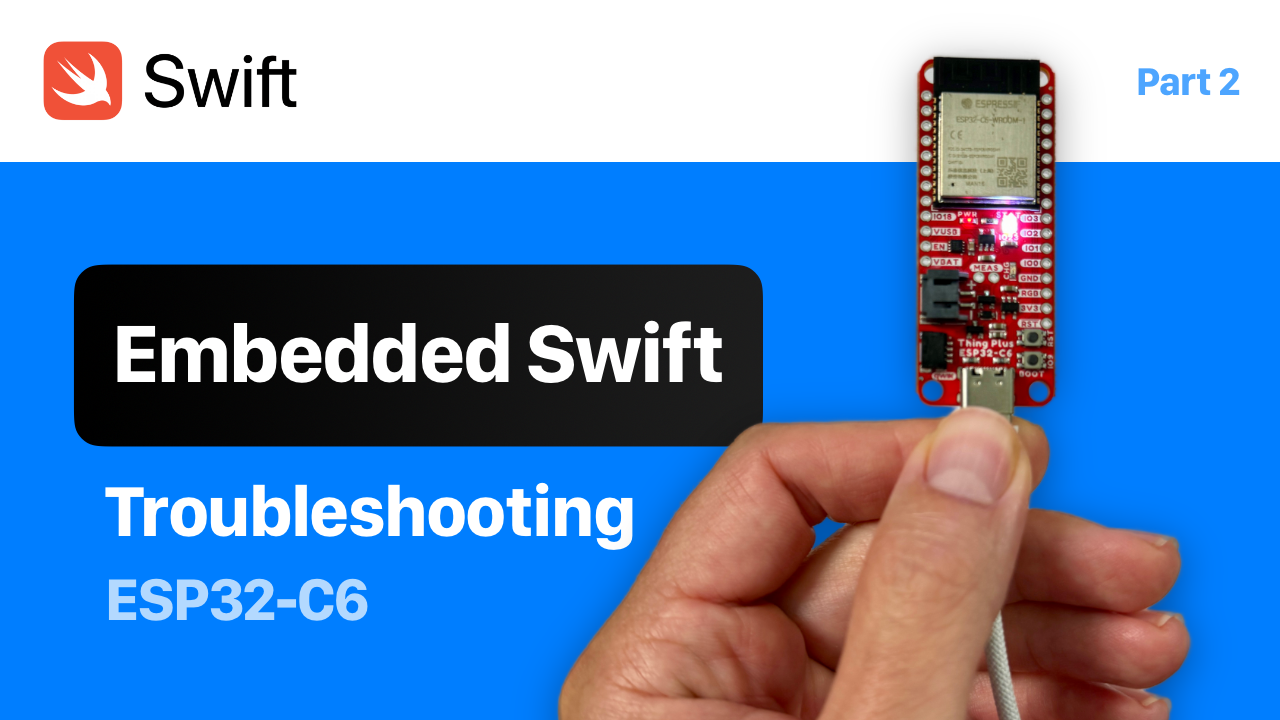
I am using an ESP32-C6 from Sparkfun. The biggest thing to keep in mind is that the LED GPIO is going to be different from Apple's code sample. So you'll need GPIO23 instead of GPIO8, which is the default for Apple's sample code.
It is hard to build the code correctly, so make sure you follow Apple's steps, and then come back here if you're having issue.
Add to your ~/.zshrc file
Add this line to your zsh configuration file (create + open it if you don't have one):
export TOOLCHAINS=$(plutil -extract CFBundleIdentifier raw /Library/Developer/Toolchains/swift-latest.xctoolchain/Info.plist)
Reload the configuration file:
source ~/.zshrc
Test the toolchain using your tool:
echo $TOOLCHAIN
swift --version
You should see output that looks like this, using your own toolchain identifier:
swift --version

Apple Swift version 6.0-dev (LLVM 0ad8ad0245d47b4, Swift 01bd2b4f8c84d45)
Target: arm64-apple-macosx14.0
That should match the output if you override the variable before the command in this format:
TOOLCHAINS=org.swift.59202407151a swift --version

Apple Swift version 6.0-dev (LLVM 0ad8ad0245d47b4, Swift 01bd2b4f8c84d45)
Target: arm64-apple-macosx14.0
If you dont' see the correct version, you may not have the toolchain setup properly. Redo those steps before proceeding, or you will not be able to build the code. You'll need to clean the project to remove the wrong build artifacts.
Embedded Swift is only available in the current trunk of the main Swift branch, so you need to make sure you're not using the Swift 6 toolchain or the Swift 5 toolchain using those environmental variables.
At this point you can setup the environment:
Setup the ESP-IDF environment
. ~/esp/esp-idf/export.sh
Setup the ESP-Matter environment
. ~/esp/esp-matter/export.sh
If you change Swift toolchains, make sure to clean the idf environment
idf.py clean
If that doesn't work, try deleting the build folder.
rm -rf build
Then try the build process again with idf.
idf.py set-target esp32c6

idf.py build

idf.py flash monitor

# Exit monitor: `Control + ]`
Reset the Matter Accessory and Try Again
You can reset your device using this command.
idf.py erase-flash
Then retry and build and run (all-in-one)
idf.py build flash monitor
Customize your LED GPIO Pin
Apple's code makes assumptions about the GPIO value for the LED. Different boards will require different values. Read your boards documentation to figure out what number to use if your board is different.
In the LED.swift, I customize the config to set the GPIO value of the LED:
init() {
  var config = led_driver_get_config()
  print("config.gpio: \(config.gpio)")
  config.gpio = 23 // default is 8

  let handle = led_driver_init(&config)
  led_driver_set_power(handle, true)
  self.handle = handle!
}
I don't know if this step is required, but it will help you see the serial interface.
Install CP210x VCP Drivers for macOS
These drivers will allow you to see the serial port connection in macOS for the uart/USB device on the micro controller. Without them you will only see the tty interface and not the cu.* serial interface.
https://www.silabs.com/developers/usb-to-uart-bridge-vcp-drivers?tab=downloads
- Download: CP210x VCP Mac OSX Driver (Unblock pop-ups in Safari)
- Unblock Driver
- Privacy & Security
- Silicon Laboratories Inc (Background Mode) below Login Items > "Allow in Background"
- System software from the following developers was updated and the system needs to be restarted before it can be used.
- Enable: CP210xVCPDriver
- Privacy & Security